Learning Styles

20 Nov

learning-style

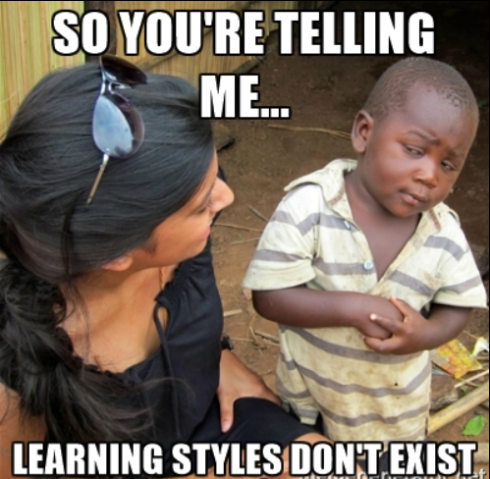
This week in my grad class we learned that learning styles don’t exist. Take that in. Challenge it if you will, but after reading multiple articles and watching this particularly convincing TED talk (Don’t Believe Everything You Think), I’m positive that learning styles are not a viable concept.

One of the things that stood out to me from the TED talk was that many people have learning preferences, but in research studies these preferences don’t actually enhance learning. You may prefer to get information visually, but that doesn’t mean when presented with visuals you’re more likely to learn than someone who prefers learning by hearing. True learning is meaning-based, and depends on how you want students to demonstrate their learning. For example, if I want my students to be able to identify three-dimensional solids from pictures, I should give them visual lessons because this is a visual skill. Regardless of their learning preference all students would benefit from seeing images of 3D solids. They might also benefit from holding examples of 3D solids, but this activity is beneficial for all students, not just the “tactile learners.”

This is the good part: not all our time spent creating activities to reach “different learners” is a waste, because differentiation is good for all students. It may be that one extra example that helps students to make a connection, but having that connection doesn’t make a student a certain type of learner.

Another key take-away from this week’s studies was the importance of background knowledge. In the TED talk linked above Dr. Tesia Marshik gives a great example debunking learning styles using a chess board. Subjects were shown images of chess boards and then were asked to recreate the arrangement of the pieces. Those subjects with knowledge of chess pieces and their movements on a board outperformed their peers. This doesn’t mean they are visual learners, it means they know more about chess. However when the pieces were shown at random places on the board that didn’t follow the rules of chess those familiar with chess scored in the same range as those who were unfamiliar. This demonstrates the importance of background knowledge and skills.

In applying this new-found knowledge in my classroom I will make sure I’m not just implementing activities for the sake of saying “Oh I’m trying to reach my kinesthetic learners.” I will approach planning from the perspective of looking for additional methods I can use to reach all my learners. I will also be sure to stop saying learning styles and instead call them what they actually are: learning preferences.

I encourage you to watch the TED talk. Also I encourage you to keep differentiating. I hope to continue to update this blog with ideas to help you do so in the classroom.


SitCog and the Pythagorean Theorem

7 Nov

This week in one of my grad classes we’re studying the theory of situated cognition (Sitcog). This is a really interesting theory that suggests one can only learn when in the proper setting. That doesn’t mean a quiet learning environment with minimal distractions; it means students should be doing and learning through practice. Sitcog claims that knowledge is not an idea or entity, but an action that can only manifest given specific context. Knowledge is  demonstrated with the learner can successful navigate a situation. This goes much further than practicing math facts and demonstrating that one can correctly perform the steps to solving an equation. Sitcog relies on students working through problems, projects, and cases to deepen their understanding in a richer way than any worksheet could do. Students will see value in learning when they can apply it to real-world situations. Yes, these problems are often challenging for students, and in middle school it is especially difficult to get students to learn by doing. Teaching through problem, project, or case based learning is not something that many of my students are used to, but by presenting students with situations that require them to apply knowledge beyond a word problem on paper they are truly learning the material.

Sitcog also stresses the role of a learner as an apprentice and suggests that one will learn best through legitimate peripheral participation. Student teaching is one example of this. As a student teacher I worked along side a professional who guided me through what I should be doing in the classroom, offering tips and suggestions. In applying this to the classroom, the teacher becomes more of a coach or mentor to students. It is not the role of the teacher to give answers or provide a step by step solution. This is difficult because as educators we naturally want to see our students succeed, and taking a guiding or questioning role is not always easy. But we also know that seeing students engaged in authentic learning experiences creates an opportunity for students to reach that “ah-ha” moment on their own. This makes a huge difference as opposed to us just telling them what to do.

I wanted to try out this theory in my own classroom so I created a problem-based learning activity for my students. We’ve been doing a lot of work with the Pythagorean Theorem, and I’ve been stressing application problems. I keep telling my students that real life will not hand them a sheet of pictures of triangles with missing sides, so they have to get used to solving the tough real-world problems. I really wanted to create an activity that could actually happen, where students could actually apply their skills. Here’s a brief overview of the activity.

  • Students work in pairs to complete a packet with questions and instructions.
  • The object is for students to build a wheelchair ramp so their friend who was recently injured in a car accident can come visit.
  • Students are given ADA specifications and a scale model of the ramp they will need to build.
  • Students had to measure the height of their ramp and then the length using a centimeter ruler. Using the scale 1cm = 1 foot, they had to calculate the length of wood needed to build the ramp. (Here’s where they use the Pythagorean Theorem)
  • After calculating how much wood they needed, they visited Lady Balsa (me in ridiculous safety glasses that I could have borrowed from Lady Gaga hence the name) at Lowes to get their wood.
    20161106_212141

    Lady Balsa and the Cutting Table at Lowes.

    • Note: This is where I really stressed students as problem-solvers. I told them their teacher was not available as they were to imagine they were at home working through this problem. Lada Balsa could really only help them with cutting wood at Lowes (I also said she charged double for at-home consultations). By creating a character for myself, I was able to step out of the teacher role and observe students in learning. Of course I wasn’t able to complete take myself out of the picture, but it was great to see students run with my alter-ego and try to work through the problem on their own.
  • They were able to select the wood (light or dark), and then it was cut to their specifications.
  • After groups finished we discussed the different ramps and where errors happened, and the different ways to solve the problem.

This went way better than I had anticipated. I expected students to struggle with knowing how to set up their measurements. There was a lot of great math in this activity. Students had to use skills to measure, solve ratios, compare slopes, scale models/drawings, and of course the Pythagorean Theorem. I did try to make it a fairly easy problem as this was the first time I was implementing this sort of activity. The students enjoyed it so much that commented how they wished we could really go to Lowes and that I should dress up like other people more often. I’m definitely wanting to try more of these sitcog activities in the future, and as students become more acustomed to doing these activities I will increase the level of difficulty. I encourage you to try out some problem-based learning activities in your own classroom. Check out Yummy Math to get you started!

20161106_212058

Some of the finished ramps. You can see the third ramp miscalculated by asking for too short of a length, and the ramp in the back was far too long.

For a complete look at the activity packet, check out this link: PDF of Activity

Were you paying attention?

10 Oct

Do you ever feel like teaching is a dog and pony show? I know I do. Wouldn’t it be great to have a classroom full of students who come in prepared and ready to focus only on the lesson you’re presenting? All eyes are on you and they’re only thinking about the math not who Bobby was sitting next to on the bus, or if Lebron’s going to score 60 points tonight. But the reality is we’re competing with so many factors for our students’ attention. Some of these factors we can’t control, but it is important that we try our best to hold our students’ attention. This week for my grad class I read a lot about memory and how it’s related to attention. In her book “Human Learning,” Jeanne Ormrod states that attention is “critical for long-term retention of information.” We often say to our students when they miss something “Were you paying attention?” but we need to make sure we use strategies to ensure they are paying attention. I know that it’s hard to make every lesson the most exciting lesson, but I want to share with you a few tricks that have worked for me.

Remove Distractions

A lot of time when students walk into my room they are carrying what appears to be the entire contents of their locker. They get locker breaks, I don’t know why they need to carry around everything. I find their gigantic binders and reading books can be a big distraction. “Look at this huge packet of work you get in Social Studies.” “Isn’t this narwhal I drew on my binder hilarious?” When my students come in each period there are directions on the board for them to follow. They almost always start with “Clear off your desk except for… ( a list of what they need to start class).” I really stress these directions at the beginning of the year. I will even show pictures on the board of what their desk should look like. I find I rarely have to say “Put that away please,” or take an item because students just know it’s not supposed to be on their desk.

Memes

I love memes. Some of them are really clever. I do not love using power point to teach, but sometimes its just the easiest way to present typed information. So I like to jazz it up with memes. Here’s an example of a recent slide I used in class to give directions and the agenda:

algebra-agenda-slide

I used MemeGenerator.net to create the meme. It’s pretty easy to use. The kids really like the memes and have even emailed me some they think I should show. (Sidebar: The memes can also help with visual imagery (also in Ormrod’s book) of important information. I even had a student tell me on a following quiz that she remembered Grumpy Cat and read the directions twice to make sure she followed them correctly!)

Student Cold-Calling

Students hate to be called on in class if they’re not paying attention, and truthfully I don’t love calling them out. I’ve tried the popsicle sticks, but wanted more student involvement. I tried letting the students choose the next person to answer. When going over answers in class, I’ll choose the first person who volunteers, then that person chooses the next student. Then the second student chooses the third and so on. They are not allowed to vie for selection out loud and students have to pick a different person each time. This method has increased participation in the beginning (because if they’re first they can get it over with), but also attention has increased because they know a friend might call on them. Even after they answer they pay attention to see if someone will get caught not paying attention. Also it’s taken some responsibility off of me and I can circulate while they answer.

Awesome Possum 

This one definitely doesn’t work in every classroom. Some kids just can’t handle it. It’s all about setting up parameters for it. If I find my kids are tuning out, or getting out of control I will say “Awesome Possum.” This is their clue to play dead. This usually involves flopping over on their desk, and there shouldn’t be any talking. I try not to say it when they’re standing so I don’t have kids throwing themselves on the floor. They do not like to be the last one to play dead. So it usually gets quiet pretty quickly. Then I say “Awesome job Possums”, we let out a few giggles at the last ones to play dead and we get back to work. It’s a nice brain break, and it gets everyone back focused on me without calling any one student out. It’s really effective for coming back together after group work, but I like to randomly throw it into instruction to get their attention. But like I said, some classes can’t handle it so we don’t play.

There are a lot of other great strategies out there for getting and holding the attention of middle school students, but I gave you these four because they are easy to incorporate and don’t require any singing or dancing. I know there’s not a lot of time in our busy schedules to create amazingly engaging lessons every day, but if you’re bored teaching it, chances are they’re bored learning it. It’s okay to say to students “This may not be the most exciting lesson, but we’re going to get through it so we can apply it to basketball (or some other more exciting topic your students are into).” We have to work at creating memorable learning experiences for our students, and that starts with getting their attention. Do you have any great strategies you use for getting attention in your class? Share in the comments!

Exponents and Dollar Store Puzzles

30 Sep
20160927_160103

Student desk during activity with question card, work sheet, and puzzle pieces.

Do you ever get tired of giving students endless practice problems from textbooks or worksheets? I do! A friend of mine that teaches remedial math shared this activity with me, and I want to share it with you all! My 8th graders love it, and I love it because they’re practicing their facts, working collaboratively, and I’m able to do a quick check to see if they’re getting correct answers.

  • I feel like this activity is really easy to explain in person, but my typed explanation might sound like this is a complicated activity. It’s not! Hopefully the pictures will help. 

Here’s the gist: Students are given a blank sheet that’s separated into 4 boxes. On a table in the front of the room I have divided puzzles and cards. Each group gets a card with some problems on it. They all solve the problems on their sheet in the box with the picture that matches the card. When they’ve decided as a group that they have the right answers, they send one person up to the table with their answers. I check their sheet. If it’s right, they get some puzzle pieces and another card. They start the next card in the corresponding box. They must send a different group member up for answer checks each time. On completing the fourth card they get the rest of the puzzle pieces. Usually the first group to complete the puzzle wins a prize.

20160927_155718

Front table setup during the activity. The first card they get without pieces, then as they get cards right they get new cards and pieces. The last pile is the pieces they get after completeing the fourth card. 

When preparing the activity I make copies of the worksheet for each student. Then I print the problem cards on cardstock. I use a different color for each group. This helps me to keep things organized when handing out the pieces. I got 24-piece puzzles from the Dollar Store. This works perfectly because I can give them 6 pieces for each correct card (MATH!!). I got different puzzles so the pieces don’t get mixed up. The kids love the Jake and the Neverland Pirates puzzle. I don’t show them what their puzzle looks like ahead of time. That would be too easy!

20160927_155755

Exponent Rules Cards

I usually use this activity for review. I’ve even used it in my algebra class, where each card was one problem (Like writing linear equations from two points). I typically give students 20-30 minutes depending on the problems. As groups finish they’re allowed to start on their homework.

Bonus: Here’s a link for a free download of the cards!!

Free PDF of Cards and Work Sheet

The cards here are exponent rules, but feel free to use the blank sheet to make your own questions. I’d love to hear from you if you use this in your classroom. It really easy a cheap and easy activity with minimal cutting.


Back to School and Pokemon…

23 Aug


Summer is officially over! In my mind at least. I know a lot of you are probably already back in session. Some of my Indiana friends have already had Meet the Teacher Night! Our first student day is a week from today, but I went in today to set up some things and I’ll be in the rest of the week. I’d love to hear from some of you tips on Meet the Teacher Night. This seems to be such a nerve-wracking night for many.

IMG_2016-07-15-13591897

A weedle helping me with some worksheets.

Back to school has dual meaning for me this year. Not only will I be returning for a second year at my current school, but I’m also attending grad school at University of Connecticut! I’m so excited to be learning all kinds of new things and meeting fellow educators. My blog is going to change a little as I start to blog not only about what’s happening in my classroom, but also my grad classes.

It’s going to be a tough year balancing my 8th graders and a full course load each semester, but I’m looking forward to the challenge. My graduate degree is going to be in Educational Technology and we’ve been talking a lot about augmented reality and PokemonGo. Of course I’ve been playing, and I’m really anxious to see if my students are into it.  I can’t wait to meet my students, and I cannot wait to share some of the things I’m going to be doing.

Here’s to a great school year!

Group Gigs (aka Group Job Titles)

3 Sep

Group GigsI’m slightly obsessed with alliteration, and I really want my group work/centers to be successful this year. Keeping those two things in mind I created a system that I hope will be really beneficial for group work this year. Yesterday I described the trays I use as notebooking supply stations. On these trays I’ve taped four numbers, and each of the four numbers is a different color. The numbers are how I give new seats and randomly call on students. The colors are for group jobs.  I also have a poster in the front of my room with job titles and colored arrows that match the colors on the tray numbers. I rotate the arrows each morning. As you can see from the photo my job titles are Discussion Director (I feel like I stole this from lit circles), Class Communicator, Inquiry Investigator, and Materials Master. Since I had all these alliterative titles, I felt like Group Job Titles just wasn’t cutting it. So that’s why I’m calling them my Group Gigs.

Check out the pics of the colored numbers on the trays –

TraysDescriptions of Gigs

Discussion Director

This student is essentially the leader of the group. He or she will always go first, and lead the discussion. He or she will also make sure all group members have completed their task before moving on. I also am going to have the Discussion Director go first when playing games or centers.

Class Communicator

This student will report group findings to the entire class. So after they’ve had time to work in groups, when we bring it back to the whole class, the Class Communicator will share his or her groups’ answers or decisions. (This prevents the same person from always sharing).

Inquiry Investigator

This student’s job is all about questions. It’s almost like he or she is the group liaison with the teacher. If the group has a question, the Inquiry Investigator seeks me out to ask the question. Then he or she will report back to the group. Also if I’m checking in on groups while they are working, the Inquiry Investigator is responsible for telling me how the group is doing. This is different from the class communicator. The Inquiry Investigator communicates just with me, not with the whole class.

Materials Master

The student who is the Materials Master is in charge of making sure all the supplies get back into the tray. He or she is also responsible for letting me know if materials need to be replaced. The Materials Master is the only student who has a job every day. If we’re not doing group work for some reason the other three get the day off.

Notebook PageI designed these groups so that each student would have some accountability. I’m really looking forward to implementing them. To introduce the jobs to the students we created a page in their notebooks with Gig Descriptions. I had students copy me, and we wrote down what each Gig “Does” and “Does Not”. We discussed each job and several scenarios. We also spent some time talking about what “Inquiry” means.


Here’s what I had the students put in their notebook…

Notebook Job DescriptionsSample Implementation of Group Gigs

Say you give your students 5 problems to work on in groups. Everyone would start working on the problems 1 by 1. When the Discussion Director notices everyone has completed the first problem he says “I got 17 for problem one. Did anyone else get a different answer?” They all agree except for one person. That student explains why her answer is correct. Now the group cannot decide who is right. They send the Inquiry Investigator to me so I can check their work. They move onto the next problem. Meanwhile I’m checking with another group’s Inquiry Investigator to see what his group got for problem 1. After I’ve given the groups time to finish the five problems, and I’ve checked in with every Investigator, I bring the whole class back together. I start by asking group 1’s Class Communicator to share their findings for problem 1, ask the other Communicators if they got the same or different answer, and then continue to check answers. At the end of the class I remind the Materials Master to check the supply tray and report any issues to me.

How do you use group jobs in your classroom? Hopefully you can use some of my ideas here, but feel free to adjust for your needs.

New to Notebooking

3 Sep

Hello teaching world! It’s been a while. I assume like me, everyone else is already back in their classrooms. I’m looking forward to another year of teaching math. I’ve made it a personal (and fairly professional) goal of mine to blog more. I’m hoping for at least a blog entry every Tuesday. Hopefully you (my wonderful followers) will find this helpful.

Interactive Notebook PicToday’s entry is about notebooks. This year I’m going to try my own version of interactive notebooks with my kids. Last year my students really struggled with organization. I wanted to come up with a better system for them. After talking with my team (the english, social studies, and science teachers), we decided on a system that we hope will be beneficial to all of the students.

Each class is color coded, math being blue. Students were instructed to get a blue, spiral notebook and a blue 3-hole punched folder. Then I gave each student two 2-inch binder rings to clip the two together. We’re also going to attach their workbooks with the binder rings. Each class has a different colored folder/notebook combo. Red – Language arts, Green – science, Yellow – Spanish, and so on. This eliminates the gigantic trapper keepers and gives the kids places for each classes materials. Being an organizational freak I looooove this system. It’s also so much less for the kids to carry. We also had them put together a “homeroom” folder. This is two binder rings with their school planner, a folder for papers to go home to parents, and their pencil pouch. This homeroom folder goes with them to every class. The main picture of this post is one of the examples of what students will be using in my class.

 Notebook Setup

These are the items I started my notebook with. For more information about each element, read on!

  • Table of Contents
  • Class Expectations
  • Notebook Rules
  • Notebook Rubric
  • Notebook Contract

Table of Contents

I’m going to have students number the pages in their notebook and create a table of contents so they can find the things they need. I started setup by having the students open to the first page in the notebook and write “Table of Contents” at the top in the margin. Then we numbered the page in the upper right-hand corner. Then we listed the items that we were going to put in the notebook. I had them write a 2 in the upper left-hand corner on the back of page 1. We left this page blank so that we can write in more items later after page 1 is full.

Page 1

Class Expectations

I had typed up my classroom expectations and grading policies for the students. I wanted them to keep this in their notebook, so I decided to put it first. To create these documents I typed them in Word, and used wide margins in the page layout section. This way students with smaller notebooks can still fit the entire sheet in their notebook. Then I put up a dashed line border, so they would have a guide to cutting out their sheet.

Pages 2 and 3Notebook Rules

For the notebook rules I modified the rules found from this Teachers Pay Teachers site. I wanted the students to have a separate contract, so I cut off the bottom portion where they sign. I do love the idea of putting a reason behind the rules though. http://www.teacherspayteachers.com/Product/Math-Notebook-Guidelines-284652

Page 4Notebook Rubric

I found a fantastic free rubric here: http://www.teacherspayteachers.com/Product/Math-NotebookJournal-Rubric-285292

Thank you Frogs and Cupcakes whoever you are. I’m planning on grading the notebooks after every Chapter Test. But I told the students I could randomly grab and grade them at anytime to keep them on their toes. 🙂

Page 5

Notebook Contract

Last item we put in today was the notebook contract. We read through the items as a class, and the students agreed the contract was reasonable. For their first assignment I had students create a cover for the notebook that we’re going to tape on tomorrow with packing tape. I’m looking forward to seeing their math-y covers. Here’s a link to the contract I used for the notebook.  It’s free and editable so you can take out my name. This will also give you a sample rectangle to see the size I used. http://www.teacherspayteachers.com/Product/Notebook-Contract-1429013

Page 6 - ContractSome thoughts on getting printed papers into the notebooks…

I had students use their method of choice today – glue stick, tape or stapler. I found tape to be the best, but I feel like we’re going to go through a lot of tape. So I may change my mind on that one. I had to show students the best way to glue stick a rectangle (ie. don’t coat the entire back of the paper with glue). The stapler was okay, except I only have mini-staplers for the students to use so it didn’t always reach to the paper. Hopefully everything stays in.

NOTEBOOKING SUPPLY STATIONS

While I’m on a roll here I’m going to tell you about the notebooking supply stations I created. Students were told to keep scissors and tape or glue stick in their pencil pouches. You and I both know that’s not always going to be the case. So I made little stations for each group of four. This wasn’t super cheap, but I know it will save me (and the students) headache in the long run. I glued a cup and basket down to the tray. My plan is to use the empty half of the tray for papers that students need to put in their notebooks. I put the necessities in each tray, and then typed up a list of what should be in the tray at all times. You can see this in the picture below. Each day a different student in the group of four will be responsible for making sure the supplies are all there. You can read more about that in my future blog post.

Notebooking Supply Station Pic

Shew! That was a long one. Feel free to comment with your suggestions and questions. I love hearing from everyone. I hope everyone’s off to a great start!

Integer Practice with Dice and Spinners

13 Sep

When I gave my PreAlgebra pretest this year several of my students said “We never learned negatives!” My heart sank. I replied “You didn’t do integers last year,” and of course I got the response “What’s an integer??” Dismay! Despair! Dread! We all know kids struggle with integers and here I was learning they’d not even been exposed to them. I decided this is where I had to start. I spent a few days going over the rules and giving notes and doing problems as a class. I feel like I worksheeted the kids to death. For a review of all the operations before a quiz I wanted to do something different than just giving the students a worksheet full of problems. So I came up with a fill-in the blank worksheet. Students worked in pairs and I gave each pair a die, spinner, and a paperclip. Each student received a worksheet. Then I gave them time to work through the sheet. It worked really well, and I was able to check students’ work as they went. They all got a variety of problems, and several students said they enjoyed creating problems this way.

Supplies for the Activity

Supplies for the Activity


I plan on using the spinners and dice again. This could work with fill in the blank fraction sheets, or fill in the blank equations. It’s nice because it doesn’t give the students too big of numbers to deal with. If you wanted them to have larger numbers you could have them roll two dice at once to create a two-digit number. You could also use this activity as a center.


How the spinner works…

I hate making my own spinners. They never work quite right, and sometimes those brass fasteners are hard to find! So now I just use paperclips. I give the kids one and have them set the paperclip in the middle, then put their pencil down in the center and spin the paperclip. Works brilliantly, and it’s sooo much easier.20130912_142007

Feeling generous… Integer worksheet and spinner template for FREE on TpT: http://www.teacherspayteachers.com/Product/Integer-Practice-using-Dice-and-Operations-Spinner-871804


Introduction Centers

7 Sep

Before I start explaining my centers I want to share a little background about my teaching situation this year. In my previous 6 years of teaching I’ve been at a large public school where there were many other math teachers to collaborate with. I also was able to talk with the teachers that taught my students the previous year. This had tremendous advantages. I also knew what the teacher did with the students in terms of curriculum or group work. This year I am the ONLY middle school math teacher in my building. I’m teaching 6th, 7th, PreAl, and Algebra. The teacher that taught math previous years was not asked to return. I feel so lost about my students! I don’t know what their previous math experience has been like, and I don’t know where their strengths and weaknesses lie. It’s definitely a learning experience for me.

Because I do feel so lost about what my students know and have done before I first wanted to see how well they worked in groups. I also want to start training my students how to do centers early, because I feel like I’m going to need to do a lot of differentiating with so many different levels of ability. Also centers take a lot of work to set up so I wanted to use one that would work in all of my classes. I decided to just do basic skills review. I thought this would be good for the students and also help me to see where there may be some gaps. Since it is the first time we’re doing centers I created three centers and we rotated about every 7-8 minutes.

For My Basic Center Set-up check out this post: https://middleschoolmathmania.wordpress.com/2012/11/09/centers/

I will tell you I got new tubs this year so my pictures might look a little different. 🙂 (The dollar section at Target can’t be beat!!)

Here’s my Introductory Centers!!

Center 1: Go FishDSCF8772

I use Go Fish cards in centers a lot. You can create them in Excel and then print multiple copies (just like regular playing cards have four 2’s, your cards can have four 0.5’s). I also like to take out some aggression using the giant paper cutter in the teachers’ workroom.

This center I did Fraction/Decimal Go Fish. Students have to get a pair containing one decimal and one fraction. I used very common/basic equivalent fractions and decimals. I printed the cards on cardstock and then cut them out. I also typed up an instruction page on cardstock and put that in a page protector.


Center 2: Amazin’ Activity –

DSCF8777This center has a gameboard, gamepieces, dice, cards, and an answer key. I used this game for the cards. I cut off the celebrations at the bottom. I love this because it comes with an answer key. Thanks Big Ideas!! Oh yeah, did I mention it was free and I didn’t have to create it?? Awesome. http://www.bigideasmath.com/uploads/games/back_to_school_review_game_green.pdf

In the tub I put the gameboard I created on Word, some random game pieces, one die, the game cards, answer key, instructions, and a whiteboard and marker. This is for the player who’s turn it is to work out the problems.

For the word gameboard you’ll need to print both pages and then line up the blue lines, cut one so you can match them up to create one large rectangular board.

A note about the gameboard: By now you might be thinking, I don’t have time to do all this for centers!!! Well I will not lie, it does take some time to set up. However, I plan on using the gameboard and instructions for the game many times throughout the year. The only thing I’m going to change are the question cards. You can easily make question cards by cutting up a worksheet full of problems, or if you have exam view use that! The kids really do appreciate it.


Center 3 – Puzzle Time

DSCF8779This center I did a very simple Tarsia puzzle. (Again see my post on Centers for a free download of this awesome software!!) Students had to fill in the blank to find the correct answer and solve the puzzle. This is a great intro to solving equations as well.

Since I’m feeling generous I’m going to post all of this on Teachers Pay Teachers for free!!! As soon as this happens I’ll post the link in the comments section below.

I think the kids did a great job with their first center day. They really enjoyed the games and also asked some really great questions. I’m hoping to build their confidence in math and show them that it can be fun!


I hope you’ll try to incorporate centers into your classroom as well. It does take a lot of work, but all great things do. 🙂

Classroom Organization

3 Sep

Today I want to share some of the ways I’ve set up my classroom. This year I started at a new school and got the chance to set-up my classroom from scratch. The only problem was that my new classroom is the former computer lab. It’s a very narrow room, and is not really meant for large group instruction. So I had to set it up in a way that allows for maximum efficiency. Here are some of the things I setup.

Supply Pouches

Image

Supply Pouches hanging on a bulletin board.

The first thing that I did was setup a bulletin board for supplies. One of the things I hate is taking up class time to pass out supplies. I also hate having to collect them, and make sure I get all the supplies back. So I spent some money to setup my supply-pouch system. Overall it’s not super expensive per pouch, and you might be able to use things you already have. I got 24 pencil pouches in assorted colors. Then I painted the numbers 1-24 on each pouch. You would need a pencil pouch for each student in your largest class. Then I filled the pouches with a ruler, dry-erase marker, dry-erase eraser, scissors, protractor, compass, and glue stick. I also wrote a number on each of these to match the bag that the supply is in. That way if you or a student finds one on the floor, they know where it goes. Then at the beginning of the year I assign each student a number. Usually I go by alphabetical order. Then if we need supplies I will have students get their own pouch when they come into the room, or call them up 8 at a time to get their pouches. I like this system because you know who’s not gotten their pouch, or who hasn’t turned theirs’ in yet. You also know who breaks something or accidentally takes something. I’ve found this system to be really efficient, and it’s a nice way to use a bulletin board as storage. I just put up push pins and hang the pouches on the push pins. The kids seem to really enjoy using the pouches too. It’s like a special treat for them.

Image

Pouch 16 with all the numbered supplies that are inside.

Student Selection

This year I’m trying something new with number cards. I know several teachers use popsicle sticks to select students for various things. Being that I do teach math I use number cards. I started by making two sets of number cards with the numbers 1-20. (I used 1-20 because 20 is the size of my largest class. I know I’m very lucky). I made the odd numbers blue and the even numbers red. This was for two reasons. First of all this allows me to easily tell 6 and 9 apart. Also this helps with my littler ones learning their odds and evens. I drew the numbers on graph paper and then laminated them since I’ll be using them frequently.

Image

Laminated number cards.

Since I’ve already assigned students a number for their pouch, I use that same number. Then if I need to randomly select a student I will shuffle the cards and draw one. I also use it for randomly choosing groups, and seating charts.

This year I also used the numbers on the first day of school. Instead of the students coming in and just sitting at a random seat, or me putting their names on the desks, I taped a number to the desk and then handed each student a number card as they walked in. That way the knew where to sit and it was a nice way to a make sure I greeted every student. Also the numbers on the desk helped me to quickly put students in alphabetical order in a seating chart.

Image

Number cards taped on the corners of the desks.

Lost and Found

Image

Lost and Found bucket and Absent Work Folder

Since I teach middle school, I have students coming in and out of my room all day. And of course they are constantly leaving things. I’m really not a fan of students always saying “I found this book, what should I do with it?” Or when they interrupt my lesson to ask if they left their binder. So I always make sure I have somewhere for a lost and found. Again I have limited space this year so here’s my lost and found bucket.

Absent Work Folder

This is one of my favorite organizational things in my room. The absent folder. You’ll see it on the wall above my lost and found bucket. I got a vertical accordion file folder. I cut off the lid/flap and then mounted it on the wall. I labeled the folders with the days of the week. If a student misses Monday, I write their name on any handouts or worksheets from Monday and put it in the Monday slot. Then they know to check it when they return. It’s also great if a parent shows up asking for work. I know exactly where to look. I try to make a habit of putting absent work in the folder when I’m passing out papers to the students that are in class. I’ve tried a few different systems, but I find this one to be really great for middle school.

Bellwork Board

A lot of teachers always put bellwork up when students enter. Or maybe a Daily Warm Up or something similar. I like to put up directions. Students know that when they first enter my room they are to look at the whiteboard under their class name to find out what they should be doing. You’ll see some examples of the directions in the picture below, but here are some examples of the directions I’ve put up during the year.

  • Clear off your desk except for a pencil and a calculator (Test or Quiz Day instructions)
  • Get your supply pouch and a white board.
  • Turn your homework into the tray.
  • Get started on the problems shown on the board.
  • Get out your homework for a check.

Generally I will have several instructions written. Students are expected to follow the directions and have them all done by the time I start class by saying “Good Morning” or “Good afternoon” I’ve found this to be a great system, and it’s easy to train the students to always follow directions on the board.

ImageI hope you find these helpful. It’s never too late to organize your classroom!